AI Image Upscaler Enlarge and Recover Detail
Enlarge a photo or logo up to 8 megapixels and get back detail that was never in the file. A real model reconstructs edges and texture instead of stretching the pixels you already have.
First upscale 1 credit · Then 8–16 by size · Download free

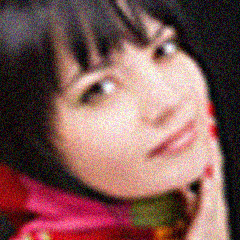
Drag to compare — a real result, 240 × 240 in, 1024 × 1024 out.
What an AI upscaler actually reconstructs
Reconstruction, not interpolation
Ordinary enlargement averages the pixels you already have, so a blurry image just becomes a bigger blurry image. A diffusion-based upscaler has seen millions of sharp images and infers what the missing detail most likely was — rebuilding edges, fabric weave, and lettering that interpolation can only smear.
Up to 8 megapixels out
Pick 2x, 4x, or Max and the tool shows you the exact pixel dimensions before you spend anything. Output is capped at 8 MP — roughly 3264 x 2448 — which covers full-bleed A4 print at 300 DPI and any screen you are likely to target.
The format is decided before the render
Choose PNG, JPG, or WebP up front and the model produces that file directly at quality 95. Nothing is re-encoded in your browser afterwards, so there is no second generation loss between what the model made and what you download.
Two enhancement passes you control
Enhance realism favours natural texture and is on by default — the safer choice for photographs of people. Enhance details pushes fine structure harder, which suits product shots, textiles, and technical drawings but can look overcooked on skin. Neither changes the price.
What it will and will not do
An upscaler infers plausible detail; it does not recover the truth. Text too small to read may come back as convincing but wrong letterforms, and a face at 40 px will not become that person at 400 px. For anything evidential — documents, licence plates, medical images — treat the output as an illustration, not a record.
AI upscaling versus resampling
AI upscaling
This tool
- Reconstructs edges and texture that were never in the file
- Up to 8 MP out, in PNG, JPG, or WebP
- A few seconds per image, and it costs credits
- Infers plausible detail — it does not recover the truth
Soft, small, or heavily compressed originals that need to hold up at a larger size.
Anything evidential, where invented detail would be misleading.
Percentage resampling
The free Upscale tool
- Interpolates between the pixels you already have
- Any percentage, no ceiling
- Instant, free, and runs in your browser
- Never invents anything
An already-sharp image that simply needs different dimensions.
A blurry original — it stays blurry, just larger.
How to upscale an image with AI
Upload your image
Drag in a PNG, JPG, WebP, or SVG. The original loads first so you have something to compare the result against.
Pick the size and format
Choose 2x, 4x, or Max, then PNG, JPG, or WebP. The tool shows the exact output dimensions and what it will cost before you run anything.
Upscale and compare
Run it, then drag the slider across the result. Both images sit in the same frame at the same size, which is the only honest way to judge whether detail actually came back.
Download at full quality
The download is free — you already paid for the render. The file comes out in the format you chose, at full resolution.
When interpolation is not enough
A logo that is too small to print
A 400 px logo from an old website will not survive a banner or a business card. Reconstructing the edges gives you crisp curves instead of stair-stepped ones.
Soft or low-resolution photos
Phone shots, old exports, and anything that has been through a messaging app come back compressed. Upscaling rebuilds edge definition the compression threw away.
Marketplace and product listings
Amazon, Etsy, and most marketplaces reject images below a minimum resolution. Upscaling gets a supplier photo over the threshold without a reshoot.
Slides and large displays
An image that looks fine in a thumbnail falls apart on a projector. Enlarging it first keeps the deck sharp on a screen twenty times the size.
Retina and high-DPI web assets
Serving a 2x asset on high-density screens stops icons and hero images looking soft, without going back to the original designer.
Or just ask
Describe the edit in your own words
Type what you want changed and the assistant does it on the canvas — each step lands as a layer you can reopen, so nothing it does is baked in.
No edits yet.
Frequently Asked Questions
Related Tools
Guides worth reading
How to Change a Logo Color in Figma (4 Methods, Step by Step)
A complete guide to recoloring a logo in Figma — the Fill row, the Selection colors panel that swaps one hex everywhere at once, the clipped-rectangle trick for placed PNGs, and why the export panel has no WebP.
How to Make a Vector Logo (and When You Actually Need One)
What vector really means, the three honest routes from where you are now, when auto-tracing works, and how to check the result is genuinely vector.
SVG vs PNG for Logos: Which File Do You Actually Need?
What SVG and PNG really are, where each one wins, why your developer keeps asking for the SVG, and the three files that cover almost every request.
Enlarge your image without losing detail
Pick a size, run it once, and drag the slider to see exactly what came back. First upscale is 1 credit.